
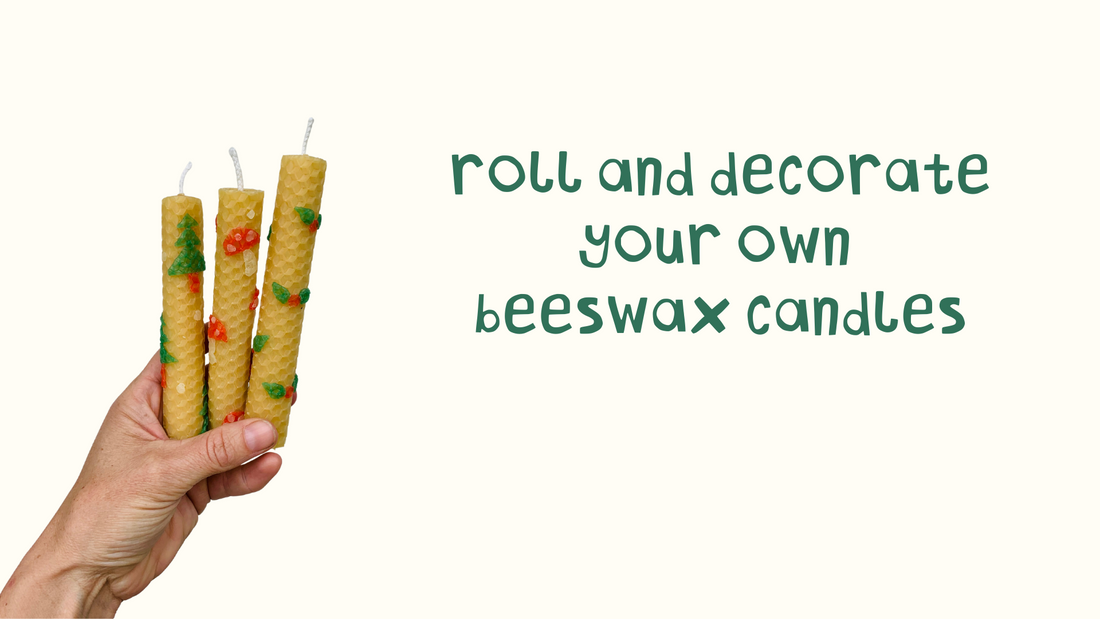
Hand-rolled Beeswax Candles
Share
Here are the instructions for using your candle-rolling kit that can be used to roll and decorate beautiful and non-toxic candles. The yellow beeswax sheets are made from NZ wax, and the coloured sheets are made from Australian wax.
What’s included:
- 8 x yellow beeswax sheet (approx. 14cm x 20.5cm)
- 5 x coloured beeswax sheets (approx. 10cm x 5cm)
- a metal hole-punch
- 2 metres of pre-prepared wick material
- Scissors will be helpful with this activity (not included)
Step 1: Set Up Your Workspace
- Choose a clean, flat surface for crafting. A table or countertop lined with baking paper will protect your work area and help with easy cleanup.
- Gather all your materials (beeswax sheets, wick, coloured wax strips, hole punch, ) and arrange them within easy reach.
Step 2: Trim Your Beeswax Sheet (Optional)
- If you prefer smaller candles, cut your beeswax sheet to a size that suits. You can use thinner strips to make shorter candles, or keep them full length to make a long pillar candle. To make a thicker candle, you can keep adding sheets of beeswax as you roll.
- Use scissors to avoid tearing the beeswax.
Step 3: Prepare the Wick
- Unroll the wick and cut it to length (leaving ~2cm extra wick at the top for lighting).
- Place the wick along one edge of the beeswax sheet, and carefully get the candle started by folding the first 3-5mm of the sheet over the wick. . This ensures the wick stays in place while you roll the candle. For little ones, it can be helpful for a grown up to get this part started for you so when you start rolling, the wick will stay in place.
Step 4: Roll the Candle
- Start rolling the beeswax sheet from the edge where the wick is placed. Roll gently and as evenly as you can!
- As you roll, press lightly to ensure the beeswax sticks together and maintains its shape.
- Once the sheet is fully rolled, press the seam down to seal it.
Step 5: Decorate
Now comes the fun part—decorating your candle with coloured wax!
- Cut the coloured wax into shapes: You can use the provided hole punch to make little dots out of your wax, or use scissors to cut shapes. You can also use your hands to roll little balls or form shapes with your fingers.
- Apply the coloured wax: Use your fingers to press the decorations into your candle. With the coloured dots, you can press these into the natural comb pattern. Be gentle to keep the shape of your candle.
- Play with patterns: You can create stripes, spirals, or other patterns by placing the coloured wax strips or coils in different designs. Press them gently into the surface of the beeswax to ensure they stick.
- Layering: If you want a multicoloured effect, layer different colours of wax by pressing one layer onto the surface, then adding another over the top.
Step 7: Trim the Wick
- Once the candle is rolled and decorated, trim the wick to ~1.5 cm above the top of the candle.
- Ensure the wick is not too long to prevent excessive flickering when the candle is lit.
Extra Tips for Candle Care:
- Burning: Always trim the wick to about ~1cm before lighting to prevent excessive smoke.
- Supervision: Always check with an adult before lighting a candle.
- Storage: Store your candles in a cool, dry place away from direct sunlight to maintain the beeswax and coloured wax.
- Safety: Never leave a burning candle unattended. Place it on a heat-resistant surface to avoid accidents.
We hope you love this project and we can’t wait to see what you create! You can tag us on Instagram @nature_clb or send us an email at hello@natureclub.co.nz.